Dreamy Guest Room Makeover Revealed!

Creating a cozy and inviting guest room doesn’t have to be expensive or time-consuming. With a few simple changes, you can easily transform your existing guest room into an inviting space for friends and family. Whether you want to go for a complete overhaul or just make some minor adjustments, this article will show you the best ways to give your guest room a much-needed makeover.
Welcome to Dreamy Room
This room was inspired by my trip to California this summer. At night when things were winding down, Maddie( my daughter), Lex (my son-in-love), and I would sit and watch The Big Bang Theory, and I loved the way Penny’s bedroom was decorated.
Keep reading to find out where that inspiration hits.

Also, one day while we were out shopping, I saw a flower called the Crane that was so neat. This became my inspiration as well.
Step 1: Choose a Color Palette
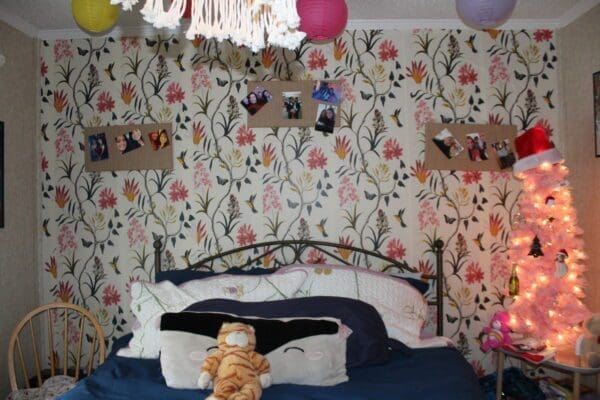
Well, as you can tell by the inspiration, I wanted to use vibrant colors but also have some subtle colors as well with it. A lot of the items that I used for this room were items that were relocated to this room from other rooms in my house. The headboard was our old one, and the mattresses were from when we upgraded ours. I was able to buy a duvet cover and shams instead of buying a whole new comfort set. It was cheaper. I decided I would go with a nice solid Navy Blue for this.

We got the mattresses off of the floor when we purchased a new frame for the bed. I wanted to be able to use the valuable space under the bed for storage. And since we now had a space under the bed I needed to purchase a bed skirt.
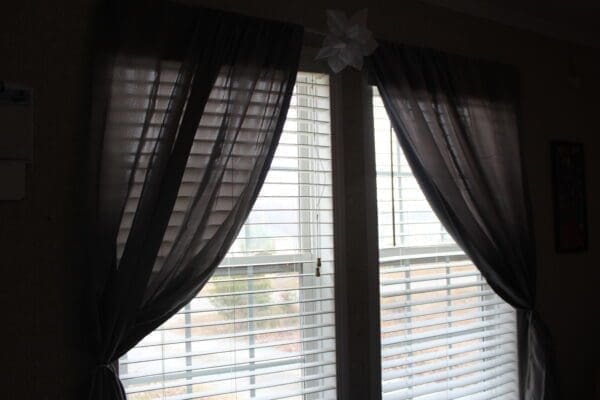
But if you are like me, you have a love-hate relationship with bed skirts. But I found one that you could slip over the mattress instead of placing it between the boxspring and the top mattress. LIFE ALTERING Moment there. I have since purchased another for my bed. For this, I went with a gray bed skirt because it flowed with the new room darkening curtains.
So the bed was done- which, as I am writing this, I think is funny that I mention this first because it was actually one of the last things I did to the room.
Step 2: Wallpaper & Artwork
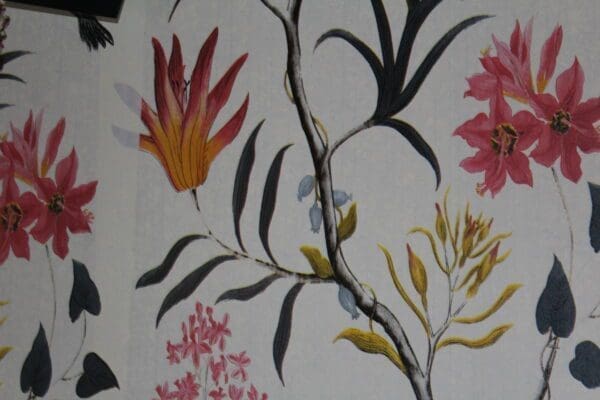
Now here is where the crane from earlier comes in. I bought this wallpaper a year before I went to California, thinking I was going to use it for some room, just not sure which one. But after I came back and saw the paper, it reminded me of the crane. I knew then this was what I would be using for the redecorating of the room. This paper is actually what sparked the rest of the room.
Since this wallpaper was peel-and-stick, it was easy to install, and I had it up within a few hours. Once I had the wallpaper, that is when I got busy with accessories.
I had actually done a few of the paintings a few years ago, so it just seemed natural to hang them in the room.
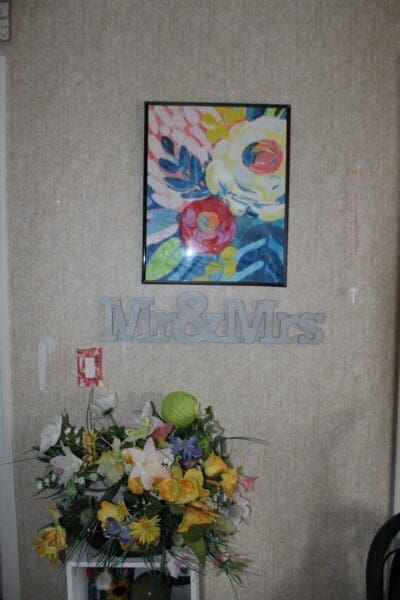
This was actually the very first one I painted. I painted this a few years ago at a retreat I was on. I have been waiting for the perfect place for it. The Mr. and Mrs. sign was from Maddie’s wedding and the flowers were from my parents 50th wedding anniversary party.
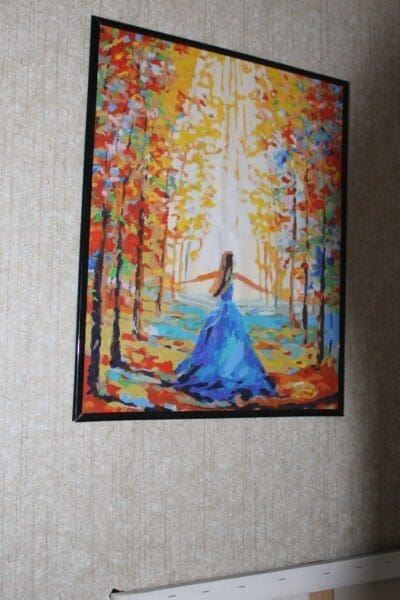
This one I painted right after I got back from the retreat. I will let you in on a little secret these are all paint-by numbers.
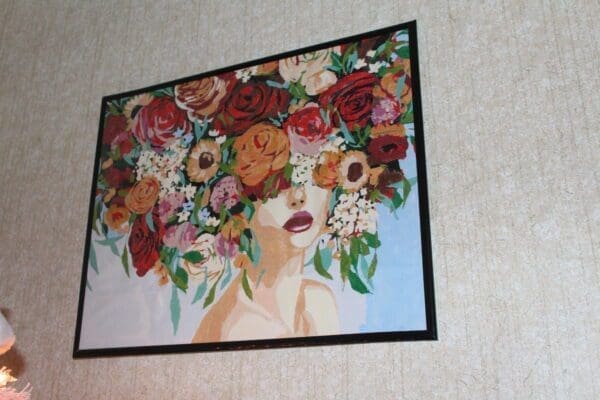
And this one I actually got to go with the room. It is another paint-by number.
Step 3: Furniture Revamp
As I said before I used our old headboard and mattress. I was even able to relocate the bookcases that were in my master closet into this room. I also was able to score a set of bar carts when they were on sale. The bigger one is now in the room and the smaller has a home in the Blog Cabin for now.
The bar cart is stationed in the corner. Right now it is holding the pink Christmas tree that was just sitting in the corner of this room.
Notice the orange tabby on the bed. Maddie made this at Build a Bear when she was younger but I wanted to include it as it reminds me of Myelin, their cat.
Step 4: Lighting & Accessories
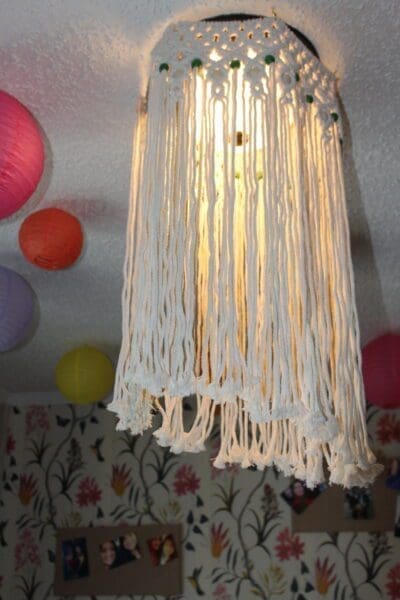
The lighting was a stroke of genius for me. My husband doesn’t like to mess with electricity so I have to find creative ways to get our ugly ceiling lights covered. This time it was so easy. I simply put cup hooks in the ceiling around the light and hung a macrame wall hanging around the light using the cup hooks.
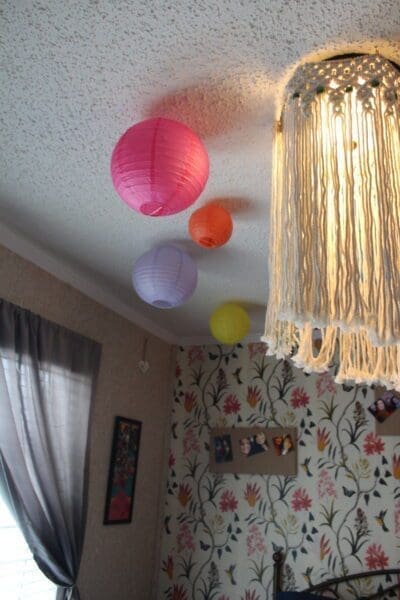
And now is where the Big Bang Theory inspiration comes in. I decided I wanted to hang Chinese / Japanese Lanterns from the ceiling. Not only was Big Bang the inspiration, but it also gives a shout out to Lex’s Asian heritage. I used cup hooks to secure them as well.
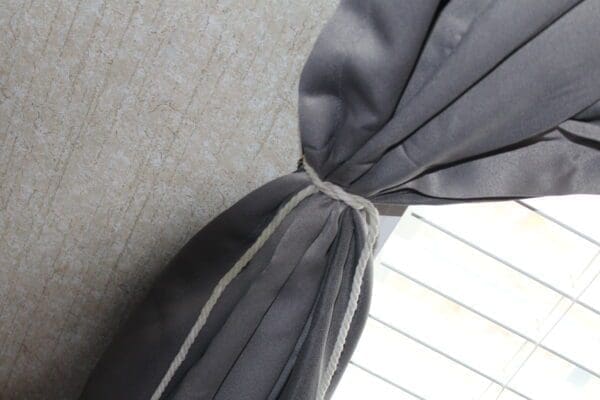
To tie back the curtains I used just a simple piece of macrame cord. It went along with the macrame covering the light.
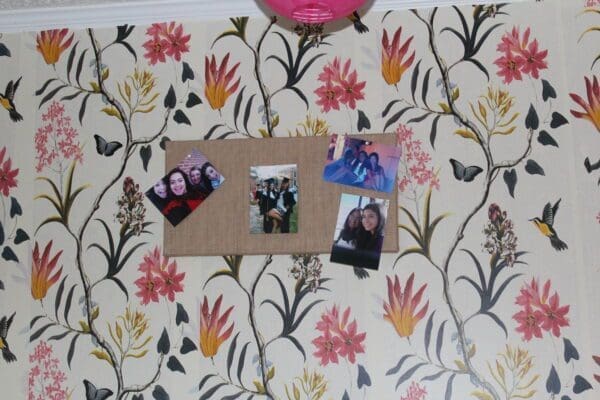
I also had these burlap canvases left over from a vision board party I had this year. So I thought why not hang them above the bed.
Step 5: Finishing Touches
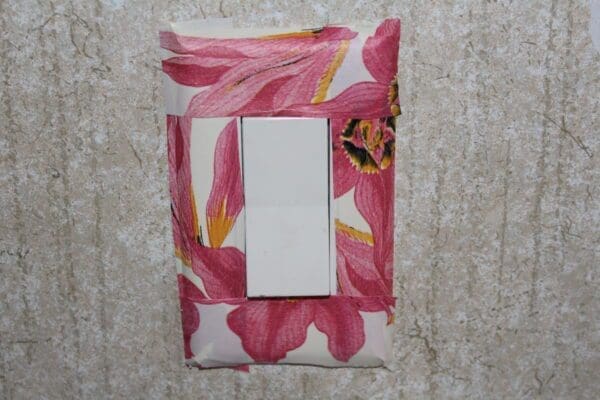
I didn’t like the way the light switch looked so I took some of the leftover wallpaper and with an exacto knife, I created a one of a kind light switch.
I also purchased a white rope basket weaved with different colors to hold all the blankets for this room.
I have got to say I am pretty proud of the way this room turned out. I can’t wait to show you the others rooms I have done ( master closet, bedroom, and bathroom) and the other 3 rooms that are on my list to tackle.
In conclusion, a guest room makeover is a great way to spruce up a home and make visitors feel welcomed. With the right materials, color palette, and furniture arrangement, it’s possible to transform an outdated space into something special. With thoughtful planning and design considerations, you can create a warm and inviting place that your guests will love. Don’t forget to add personal touches like framed photos and artwork that reflect your style.