Tips and Tricks for Customizing Shirts at Home
It’s time to whip out the sewing kit and art supplies ‘cause today I’m getting crafty. Whether y’all have a big family trip planned in the future or want a creative task to try with your little ones, designing family t-shirts is a fun and easy way to get what you want. DIYing saves money and creates a bonding experience to share with our kids. It’s also a great activity for all ages to enjoy. Here are some tips and tricks for customizing shirts at home.
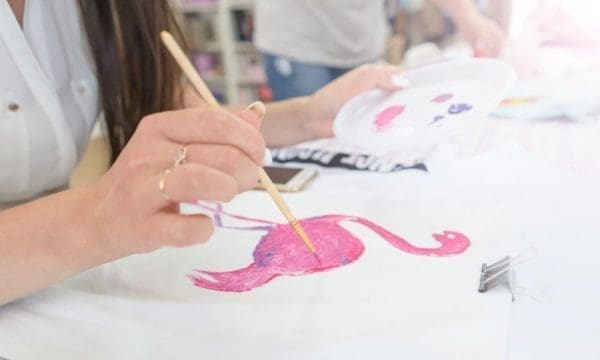
Embellish With Fabric Paint
Let your creative juices flow with fabric paint and markers. No matter the type of shirt we use—a new tee, thrifted find, or back-of-closet oldie—gold fabric paint works with most fabrics. There are various ways to personalize shirts with paint, including adding prints, patterns, drawings, color splotches, and monograms. Embellishing with fabric paint and markers generates unique outfits with a story and memory attached to them. It also allows our kids to practice independence with some creative freedom. Plus, we can use these designs to cover stains on their clothes!
DIY Graphic Tees
If y’all want sleek and fashionable results, DIYing graphic tees create professional-looking shirts with little to no effort. Styling graphic tees into chic outfits persist as a popular fashion trend, something I’m all for. Combined with a plain base, graphic designs make a cozy and stylish piece of clothing. All we need for an at-home printing session is an iron, a plain shirt, saran wrap, a large printed design, and parchment paper. I wrap all sides of my chosen printed picture with saran wrap, then place it in the desired location on the shirt. Then, I cover the wrapped image and print location with a sheet of parchment paper and slowly iron over the sheet to seal the deal. With adequate pressure and time, we’ll get a seamless and easy DIY.
Create a New Cut
We can achieve a lot with just a pair of scissors on hand. One of the cheapest and simplest shirt DIYs to try is creating new cuts on old t-shirts. From snipping sleeves to cropping hems to adding fringes, cutting up shirts create various design options that repurpose items already in our closets. Plus, cutting shirts provides an easy solution to getting rid of unraveling seams, and gives more breathability to tight tees.
Iron-On Patches and Sew-On Buttons
Adding patches and buttons accessorizes your shirts without drastically changing them. Patches and buttons come in various forms and colors, giving y’all versatility in customization. They also leave very little room for mistakes. The part I love the most is that once we’ve bought a set of patches or buttons, we can use them on other items like bags, hats, blankets, and pants, creating future DIY sessions to enjoy again with the family.
In the following years, y’all can look back at the shirts and remember the moments you shared making and wearing them. With these tips and tricks for customizing shirts at home, we can explore different ways to DIY new or old clothes, or cover up some stains!