Pumpkin Carving With Ghoulish Delight
Today I am honored that my partner in party Lorelai is guest posting.
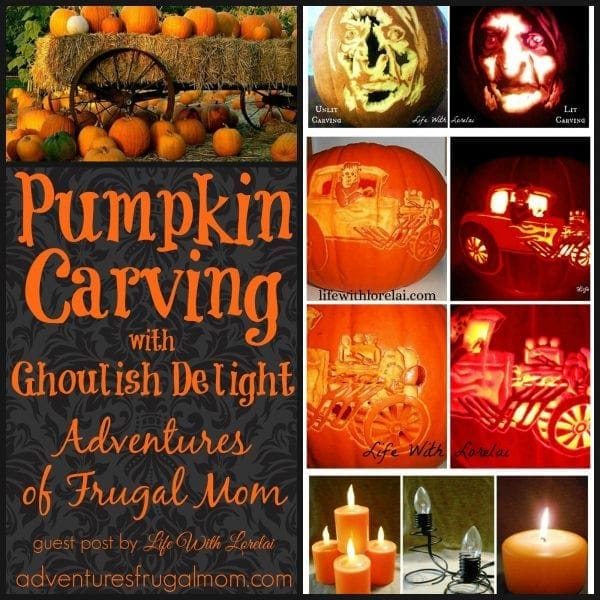
Hi, I’m Lorelai. I host the Home Matters Linky Party with Melissa, and I am so thrilled that she invited me to guest post on her blog today. As Melissa knows, and now you will find out, I love Halloween, and in particular, I love Pumpkin Carving! I have an entire page on my blog, Life With Lorelai, dedicate to the subject. So, if you are looking for some fun ideas and carving inspiration, along with some detailed tutorials, be sure to stop by my Pumpkin Carving Page.

In this post, I will take you through some of the basics of Pumpkin Carving, and touch on somewhat more intermediate or advanced tricks and techniques. Let’s impress your family and friends with frightfully awesome and spooktacular carved pumpkins!
[Tweet “Give your pumpkins #Halloween Flare with these #PumpkinCarving tips! @LorelaisLife @MMGMOM3”]
Pumpkin Carving: The Basics and Then Some
Picking Your Pumpkin:
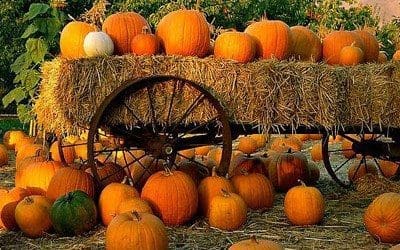
- Choose a pumpkin that has no soft spots or punctures, and that is not weeping, oozing, or growing mold.
- Keep in mind that some pumpkins have growths on them. They scrape off easily.
- Look for a pumpkin that does not have deep grooves in the surface you want to carve. A smoother, more even skin is easier to work with.
- Give your pumpkin the “Thumbnail Test.” Gently press your thumbnail into the bottom of your pumpkin to see if you can leave an indentation. No mark means the pumpkin is too hard to carve.
- Wash your pumpkin with soap and water, then pat dry.
- Check out my post Perfect Pumpkin Picking For Carving for more information.
Tools:
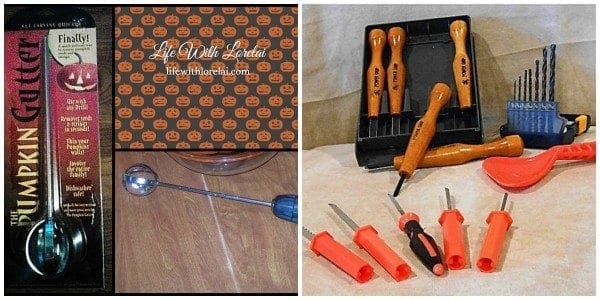
- A knife, of course, to cut open the pumpkin. TIP – cut a hole in the BOTTOM of the pumpkin. This will allow you to give the pumpkin a stable base for sitting. It also makes lighting the pumpkin much easier.
- Those Pumpkin Masters Carving Tools you find in almost every store this time of year are great—if you use them properly. They are called Saws and not Knives for a reason. You do not Cut with them, you use a Sawing motion—a quick back-and-forth with very little pressure. Use the coarse saw for larger, straighter lines, and the finer saw for smaller, curved areas.
- An exacto-knife is also a helpful tool.
- For more advanced carvings, wood cutting tools and drill bits are my go-to.
- Get more Tool Tips at Pumpkin Carving: Tools Of The Trade .
- One of my favorite tools is my Pumpkin Gutter. Learn more about this in The Girl’s got Power Tools! Pumpkin Gutter.
Design Tips:
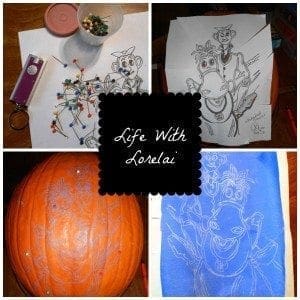
- Make copies of your design before putting it on your pumpkin. That way, you can use one to look at as you carve. You also want to have a copy for future use.
- Trim the pattern, and cut slit around the outer edges, to fit the curved surface of the pumpkin better. Tape the pattern to the pumpkin with Masking Tape.
- TIP – Do Not poke your design onto the pumpkin. Make it easy on yourself by stopping by your local Art Supply Store and getting Saral Transfer Paper!
- Trace your design.
- Stop by my post for more Pumpkin Carving Design Tips & Tricks.
Gutting and Preserving the Pumpkin:
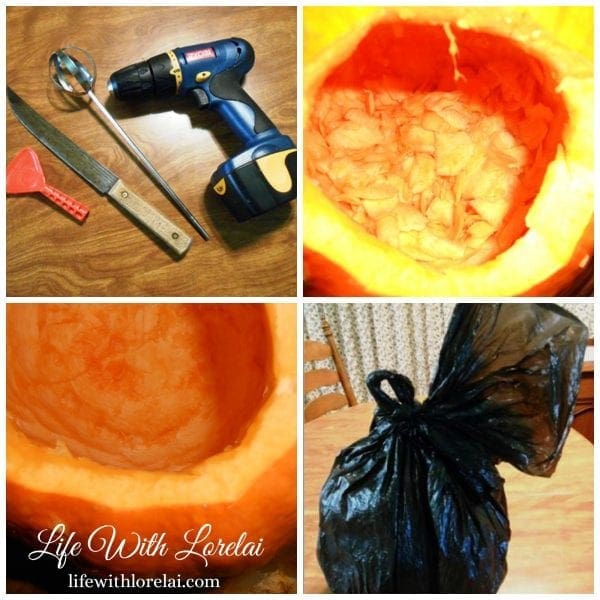
- You have your design transferred onto your pumpkin. Place Pins in a few of the Black areas (the areas you will be cutting totally out).
- Using the large knife, cut a hole in the bottom of the pumpkin.
- Clean out the inside using the Pumpkin Gutter and / or a scraper. You want the sides of your pumpkin to be ½-inch to ¾-inch in thickness. This will give you the best illumination for your design and the entire pumpkin will have a glow.
- Place your carved pumpkin in a large plastic bag, and put store in the refrigerator when not displayed. Be sure the pumpkin does not freeze.
- Get more tips at Pumpkin Carving – Gutting and Preserving Your Pumpkin .
Carving and Lighting Tips:
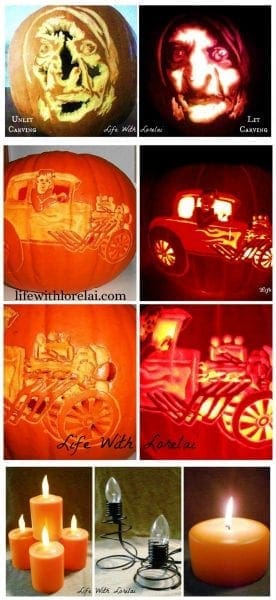
- Put a towel down on your table, and get a large bowl. Place your pumpkin in the bowl. This keeps your pumpkin stable, and allows you to turn the pumpkin to get the best angel for carving your design.
- Carve from the center of the design to the outer areas, starting with the most intricate or detailed areas.
- Do Not punch out the cut-out pieces. Leave them in place to help provide strength to the pumpkin during the carving process.
- My favorite way to light my pumpkins is with an electric lightbulb (I have ones that are on wire springs so I can adjust their height and position). But, you can use the traditional candle, battery powered candles, or even Christmas Lights in or wrapped around a Mason Jar.
- Do check out Pumpkin Carving – Carving & Lighting Tips & Tricks for more in depth information.
Creating Your Own Designs and Patterns:
- If you are interested in making your own designs, check out DIY Pumpkin Carving Patterns .
[Tweet “Check out these tips for #PumpkinCarving with ghoulish delight! #Halloween @LorelaisLife @MMGMOM3”]
I hope you have enjoyed these pumpkin carving tips and tricks, and maybe even picked up a few that will help you with your pumpkin carving. I would love to have you stop by my Pumpkin Carving Page, where you will find other pumpkin related posts such as: The Pumpkin Prayer, The Legend of the Jack-O’-Lantern, and Halloween Funnies: Hoots, Hollers & Howls.
Thanks again, Melissa, I appreciate this amazing opportunity to share with your readers.

Lorelai is a native Californian growing up and living in the coastal city of Huntington Beach, in Orange County.She is a writer of cozy mysteries and children’s fantasy; her pumpkin carving is an art and a passion; singing karaoke gives her “shy” side an outlet; and gardening with her boyfriend, Luke, teaches her to appreciate the goodness of worms, and provides her the opportunity to really stop and smell the roses! This mother of two embraces life, shares her stories, makes killer cheesecakes, throws fabulous parties, and has an addiction to coffee. Follow her at her blog, Life With Lorelai.