How to Make Rich and Creamy Butter with a Cream Separator at Home: A Step-by-Step Guide
Creating rich and creamy butter at home starts with separating cream from milk, and using a cream separator by Milky Day simplifies this first crucial step. Once you’ve obtained the cream, it is essential to prepare it properly before you begin the churning process. Ensuring the cream is at the right temperature and consistency can make the difference between good butter and great butter.
After the cream is prepared, churning transforms it into the velvety butter that you’re aiming to achieve. This process requires patience, as it involves the fat globules in the cream sticking together to form butter grains. Afterward, you will wash and knead these grains to eliminate any remaining buttermilk, this improves the butter’s taste and extends its shelf life. Although making butter at home might seem old-fashioned, it allows for a customized flavor and texture that store-bought butter cannot match.
Key Takeaways
- Using a dedicated cream separator enhances the butter-making process.
- Proper preparation of cream prior to churning is crucial.
- Kneading the butter ensures a richer taste and longer-lasting product.
Preparing the Cream for Separation
Before transforming your cream into rich and creamy butter, preparation is key. Ensuring the cream’s components and fat content are optimal will affect the final product’s quality and freshness.
Understanding Cream Components and Fat Content
Cream is categorized by its fat content, with heavy cream boasting a higher percentage compared to whipping cream. For a richer butter, opt for heavy cream with a fat content of at least 36%. Be mindful that the fat content directly influences the butter’s consistency and flavor.
Using the Cream Separator
To start the process, employ a quality cream separator designed for home use. This equipment spins the cream to separate the butterfat from the liquid. Maintain a steady flow rate as per the manufacturer’s instructions to achieve the best separation.
Setting the Temperature for Optimal Separation
Temperature plays a pivotal role in cream separation. Warm cream, typically around 55-60°C (131-140°F), separates more efficiently as the fat globules rise more quickly. Make sure your cream reaches the optimal temperature before processing it through the separator for a smoother experience.
Tips for Pre-treatment of Cream
Pre-treating your cream can enhance the butter’s fresh taste. If you’re using pasteurized cream, allow it to ripen to develop flavor. Keep your cream and equipment scrupulously clean to avoid any off-flavors, and consider culturing the cream to infuse a subtle tanginess into your homemade butter.
Churning and Perfecting Homemade Butter
Once you have separated your cream using a cream separator, it’s time to transform it into rich and creamy butter. This section will guide you through the churning process, identifying when the butter is ready, proper washing and shaping techniques, and the best methods for flavoring and storing your homemade butter.
The Churning Process
To begin churning your butter, you will need a butter churn, which introduces agitation to the cream, causing the fat molecules to clump together and separate from the liquid, known as buttermilk. If you’re using a mason jar, simply add your cream, secure the lid tightly, and shake vigorously until solids form. With a traditional churn, turn the handle or crank until you achieve a solid mass of butter.
Determining the End Point of Churning
You’ll know churning has reached its end point when the sound of the liquid splashing stops and the butter granules start sticking together. At this stage, it’s important to drain off all the buttermilk, as any remaining liquid can shorten the butter’s shelf life and affect its flavor.
Washing and Shaping the Butter
Once you’ve obtained your butter, it’s crucial to rinse it with ice water to remove any last traces of buttermilk. Gently press the butter using a spatula or spoon to squeeze out excess water. Shape the butter as desired, and if you’re making unsalted butter, be meticulous in rinsing it until the water runs clear, as noted in Tori Avey’s butter making guide.
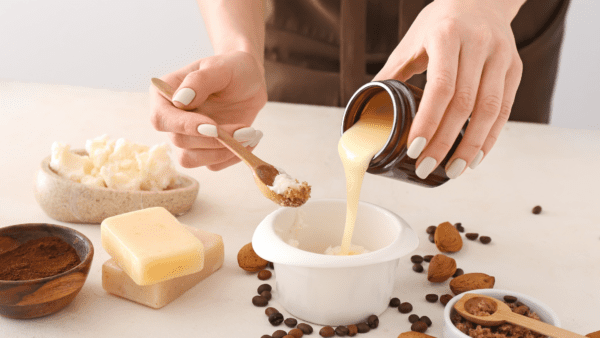
Flavoring and Storing Butter
You may choose to create salted butter by working salt into the freshly made butter. For added flavor, consider making compound butter by incorporating fresh herbs, citrus zest, or spices, like in garlic butter. Store your butter in an airtight container in the fridge to keep it fresh. Culture butter adds another dimension of taste and can be achieved by allowing the cream to ferment before churning.
Conclusion
You now have the know-how to transform cream into homemade butter using a cream separator. Remember, starting with high-quality cream is fundamental for a rich taste and creamy texture. The right technique, whether patting the butter to shape it or culturing it with kefir for a unique flavor, can make all the difference. With practice, you’ll refine your butter-making skills and enjoy the delicious results of your labor right from your own kitchen.