Lower Your Expenses With 3 Simple Maintenance Steps for Your Air Conditioner
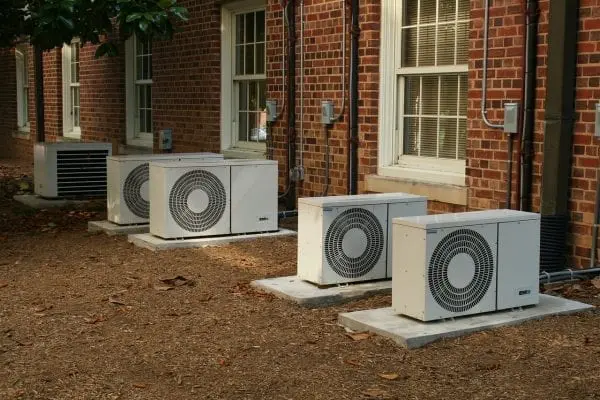
In most households, cooling costs are one of the highest monthly bills during most of the year. Tips like proper insulation and temperature settings can help control these costs, but poor maintenance may inflate these bills by as much as 40 percent. So, while many homeowners obsess over a degree or two on the thermostat or an inch or two in the attic, they should probably be more concerned with proper maintenance.
Many maintenance issues begin when the unit arrives on site. Sometimes, the technicians do not install it properly, and other times, the unit is inappropriate for that particular dwelling. Oshawa air conditioners eliminate these problems by only using the most experienced contractors and never selling a one-size-fits-all HVAC system.
But for the most part, the homeowner is responsible for routine air conditioner maintenance, and this task is much easier to perform than you may expect.
Replace the Filter
If the filter is dirty, the air pump must work much harder than it would otherwise to control the indoor temperature. Moreover, the dust, pollen, and other contaminants that sucked out of the house go back in through the air vents, and that often causes significant discomfort for people in the house, especially guests who are not accustomed to the higher levels of particulate matter.
Changing the filter, or cleaning a reusable one, is by far the most important air conditioner maintenance task. It should be performed once a month during peak seasons (summer and winter), and once a quarter during off-peak seasons (spring and fall).
Evaluate Internal Components and Wiring
Always put safety first and always disconnect the power from the source before checking the unit’s electrical components.
Next, take off the condensing unit’s access panel and visually inspect all the wires and components, looking for any evidence of overheating such as black wires or melted insulation. Use a good flashlight for best results, and keep a small pair of pliers or screwdriver handy if the wires need a little untangling.
Then, turn your attention to the contactor switch. The contractor is the mechanism that alerts the system to come online. If there is a great deal of pitting or it otherwise does not look almost factory new, it probably needs to be replaced.
Finally, use an electrical test meter to ensure that all connections are at peak effectiveness. If you don’t own a meter, a visual inspection should do. Be sure all the connections are very tight. If any of them need to be replaced or tightened, you can probably do so yourself.
Check the Fan
While the power is off, inspect the compressor fan for signs of excessive wear, like chips and cracks. Such wear disrupts the airflow and is often symptomatic of other problems as well. Since the fan is on the outside of the unit, it’s especially susceptible to damage from branches, wind, and so on, so these issues are fairly common.
Also, many older HVAC units have fan motor bearings which require regular oiling.
To keep your house cool and welcoming, and to keep your utility bills under control, perform regular maintenance on your outdoor HVAC unit
Similar Posts:
- The Money-Saving Benefits of Changing Your Air Filter
- Getting a New Air Conditioner on a Budget
- 3 Important Benefits That Come From Renting
- Fall and Winter Efficiency Tips
- Cleaning Tips for Your Air Fryer


