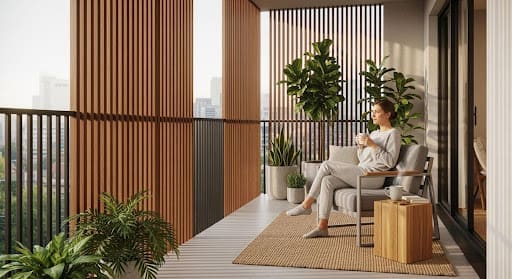
DIY Balcony Privacy Screens You Can Install in a Day
Do you ever feel like your balcony is too open for comfort? Many people living in close quarters or apartment buildings face the same problem-there’s not much privacy. Luckily, adding a privacy screen is a simple answer.
The best part? You can put up a DIY balcony privacy screen in just one day, making your outdoor space feel safe and peaceful without a big project. All you need is a covering that blocks views and suits your style.
Once you install a balcony privacy screen, you’ll enjoy your time outside even more, whether you’re drinking coffee in the morning or relaxing in the evening.
This article walks you through several DIY options, from easy fabric solutions to slightly more complex projects-all doable in a day. We’ll talk about what materials to use, what tools you need, some installation tips, and ways to decorate your new private space.
Let’s get started and make your balcony your own!
Why Pick DIY Balcony Privacy Screens for Fast Setup?
Choosing to make your own privacy screen comes with lots of advantages, especially if you want a project you can complete quickly.
You control the process, can make it exactly how you like, and you usually save money compared to hiring someone.
Why Make Your Own Balcony Privacy Screen?
The main reasons to try a DIY balcony privacy screen are flexibility and saving money. You get to pick the material, color, and style that fit with what you already have outside, making sure your new screen both works well and looks good. This personal touch means your balcony will be private and special to you.
Most DIY options are also very affordable, using items you can find easily or even recycle. This makes better privacy possible even on a small budget.
Besides saving money and making your space look good, doing it yourself can feel rewarding. It’s a nice feeling to finish a project yourself and see the results right away, instead of waiting for something pre-made to arrive.
Can a Privacy Screen Be Installed in One Day?
Yes, many privacy screen ideas can easily be finished in just a few hours! The key is picking the right kind and getting your materials and tools ready up front.
Simple options like hanging fabric, using portable dividers, or attaching reed rolls can be done quickly. Even bigger projects, like putting together a planter box screen, can be done in one day if you plan well.
Choose something that matches your skills and the amount of time you have.
Things to Think About Before Picking a Privacy Screen
Before jumping in, there are a few things to think about. First, look at your balcony: what can you fasten things to? Do you have a railing, an awning, or posts? This will affect your choices.
Next, decide how much privacy you need-is total coverage important, or will partial do?
The weather where you live also matters. If your area gets strong winds, you’ll need something sturdy and well-anchored. Think about sun and rain, too, so you pick a material that will last.
If you rent, focus on options that don’t need drilling or any permanent changes. Things like macrame, movable dividers, or screens you can easily attach and remove are all good choices.
Types of Balcony Privacy Screens You Can Put Up in a Day
One great thing about DIY balcony privacy screens is how many choices you have, so you can pick something that fits your taste, is easy to install, and gives you the privacy you want. Here are some common types you can finish in one day.
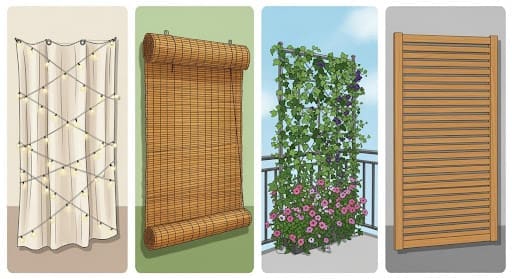
Fabric and Outdoor Curtain Screens
Using privacy fabric is a quick and effective way to make your balcony more private. It can block out nearly all views if that’s what you want. Just measure for a snug fit on your railing. This fabric comes in many colors to match your style.
Outdoor curtains are another good choice-you can hang them from posts or an awning. Thin curtains let in light but still give a little privacy.
Blackout curtains block views completely. Be sure to pick outdoor fabric, so it won’t get damaged by sun or rain.
In mild climates, even a shower curtain or a colorful bed sheet can work well for privacy and style.
Reed Rolls and Bamboo Screens
For a natural or relaxed look, reed screens are a top pick. These are ready-made mats with many thin reeds. They give privacy but still let in some sunlight.
Reed or bamboo screens can be cut to fit and are easy to attach to railings. Bamboo screens work much the same way and give your balcony a warm, outdoorsy look.
Portable Room Dividers
A completely tool-free choice is a portable room divider. These folding screens come in many designs to match your space. The big plus is you can move them, take them inside, or shift them when needed.
Pick something made with weather-safe materials if it will be outside. You might also find interesting used dividers at thrift stores for a unique touch.
Upcycled Pallet and Wooden Screens
If you enjoy woodworking, turning old wood pallets into a screen is a smart, low-cost way to add privacy. Sand them down and stain if needed, then fix them to your railing or make a stand-alone screen. You can hang planters on them for added privacy and a vertical garden look.
Planter Boxes with Vertical Screens
These screens combine a planter with a vertical panel. Build a simple box, add upright posts, and attach privacy panels (like slats or lattice). Fill the planter with soil and plants to keep it steady. This gives privacy and adds greenery, which hides unwanted views and looks great too.
DIY Trellis and Vertical Gardens
Ready-made lattice trellises can easily become privacy screens. Fasten them to your railing, wall, or place them in heavy pots to stand up on their own. Grow climbing plants like ivy or vegetables, or use fake vines or lights for decoration. Over time, plants fill in and block more of the view.
Macrame, Tapestries, and Decorative Panels
For something more artistic, try a macrame hanging or a tapestry. Macrame is a simple craft using knots in yarn or string. You can easily tie it to your railing and take it down anytime, which is great for renters.
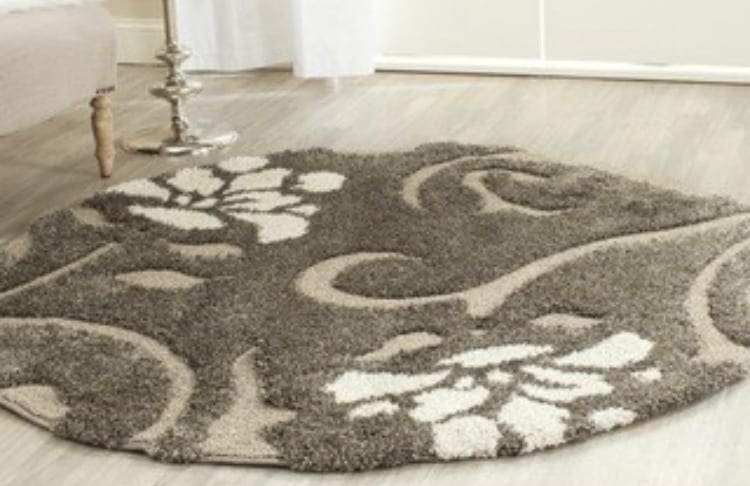
Tapestries, or even rugs, can also be draped for quick, stylish privacy, especially for special occasions or evenings outside.
What Materials and Tools Do You Need for a One-Day DIY Privacy Screen?
Being ready with the right supplies keeps your project smooth and fast. Plan ahead so you don’t have to keep running to the store.
Common Materials and Their Benefits/Drawbacks
| Material | Pros | Cons |
| Fabric / Curtains | Easy to fit; many colors; lightweight | May not fully block; can blow in wind |
| Reed / Bamboo Rolls | Natural look; easy to trim; lets in some light | Less durable if untreated; not fully private |
| Portable Room Divider | No mounting needed; reusable; flexible | Needs outdoor material; can blow over |
| Upcycled Pallets/Wood | Cheap or free; sturdy; rustic look | Needs prep (sanding, staining); heavier |
| Composite Panels | Strong; blocks view well; long-lasting | Harder to cut; more assembly |
Basic Tools for a Quick DIY Job
- Tape measure (for sizing)
- Drill or screwdriver (if using screws)
- Level (for straight lines)
- Scissors or utility knife (for cutting fabric or rolls)
- Saw (for cutting wood, or get it cut at the store)
- Zip ties, rope, or bungee cords (for fastening screens)
- Pencil (for marking measurements)
Staying Safe While Working on Your Balcony
- Watch where you stand to avoid falls.
- Wear gloves and safety glasses if using tools.
- Be sure ladders or stools are on steady, level ground.
- Check that your privacy screen is firmly attached and won’t blow away.
- Ask someone to help if your materials are heavy or large.
How to Install a DIY Balcony Privacy Screen: Step by Step
Once you’ve picked your screen and gathered everything you need, follow these steps for a fast and easy installation.
Step 1: Measure and Plan
This is the most important step. Measure carefully-how tall and wide is the space you want to cover? Decide whether you want full or partial coverage. Plan where to attach the screen and how to fasten it-zip ties, clips, or hooks. Simple sketches help, especially for more complex screens.
Step 2: Installing Fabric or Curtain Screens
Hem the edges if needed to keep them neat. If your fabric lacks grommets, add them or use loops. Mount curtain rods or tension rods to the balcony if using curtains. If using panels, zip tie or clip them to the railing, keeping the fabric tight and even. Overlap panels for better privacy.
Step 3: Attaching Reed, Bamboo, or Plastic Rolls
Unroll and lay your chosen material along the railing. Secure it at the top, bottom, and, for tall screens, in the middle with zip ties or wire. Trim excess with strong scissors. Check for sharp plastic edges on synthetic rolls and smooth as needed.
Step 4: Setting Up Portable or Freestanding Screens
For folding room dividers, just place them where needed. If building a freestanding planter or screen, assemble the box first, then attach upright posts and finally your privacy panels. For more stability, use spike anchors or tie-downs if exposed to wind.
Step 5: Mounting Trellises and Vertical Gardens
Attach trellises with U-bolts or zip ties to railings, or use wall hardware if mounting to a wall. For free-standing ones, heavy planters can hold them up. Once secure, add climbing plants, vines, or lights for a personal touch.

Making Your Balcony Privacy Screen Look Great
After installing your screen, add decorations to make the space welcoming and stylish.
Adding Plants and Greenery
- Place large potted plants around the edge for more coverage.
- Hang planters from the railing or overhead for a vertical garden.
- Let climbing plants grow up trellises for natural privacy and beauty.
- Grow herbs, flowers, or veggies for a useful and pretty touch.
Adding Decorations
- String lights through your screen for a cozy look at night.
- Hang outdoor art, wind chimes, or small mirrors.
- Stencil patterns or add weatherproof stickers to solid screens.
- Use trellises to hang lanterns or bird feeders.
Layering for More Privacy
- Combine a fabric screen on the railing with tall plants in front.
- Overlay a reed roll with climbing plants.
- Use a sheer curtain for daytime and blackout curtain at night.
Should You Worry About Maintenance and Weather?
A few simple habits will keep your privacy screen looking nice and working well for a long time.
How to Keep Your Screen Looking New
- Clean fabric screens as the care label suggests, or hose them off.
- Wash wood and pallet screens with mild soap and water.
- Brush off reed or bamboo screens to get rid of dirt.
- Check fasteners-replace old zip ties and tighten loose screws.
How to Make Your Screen Last Longer
- Seal or stain any wood to stop moisture and sun from causing damage.
- Choose fabrics made to resist sun and water.
- Bring portable screens inside during storms or freezing weather.
DIY Balcony Privacy Screen FAQ
Are These Screens Good for Renters?
Many DIY balcony privacy screen ideas work well for renters. Anything that doesn’t require drilling or permanent changes is a good fit. Try macrame you can tie on, foldable room dividers, or planter box screens you can move.
Even fabrics or reed rolls held by zip ties are easy to take down and don’t leave marks. Always check your rental agreement first.
Can Privacy Screens Be Removed or Moved?
Yes! Most DIY privacy screens are easy to remove, store, or even take to your next home. Room dividers can be folded and packed away.
Fabric, reed, or bamboo screens held by ties can be taken down, rolled up, and kept for later. Larger planter screens are also easy to move. This makes it simple to adjust to the season or a new space.
What Are the Best Cheap Privacy Screen Ideas?
If you don’t want to spend much, try these ideas:
- Use free or cheap wood pallets for a rustic screen.
- Make a macrame banner from yarn or twine.
- Hang a rug or thrifted fabric as a temporary shield.
- Use basic privacy fabric or even a shower curtain with zip ties.
- Reed rolls are less expensive than custom-built screens.
You don’t have to spend a lot to make your balcony feel private and comfortable.