How To Save Hardwood Floors From Water Damage
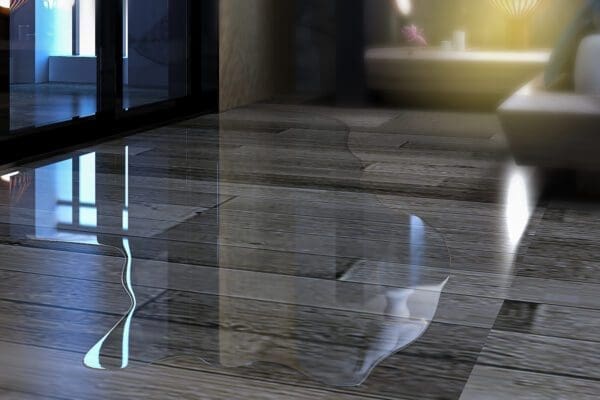
Harwood flooring remains a favorite among many homeowners. This is because it has outstanding aesthetics, is durable and warm, and can comfortably fit in various design schemes. It’s also easy to maintain, and its installation can increase a property’s value.
However, hardwood doesn’t like water. If not contained immediately, moisture can destroy all the good qualities of hardwood flooring. However, knowing what to do can save your floor from damage or replacement. If you feel overwhelmed, you can hire the services of water damage or flooring professionals near you. If you live in Brisbane, you can check out waterdamagespecialist.com.au/brisbane/ or other professionals near you.
If done right, the following crucial steps can help you save your hardwood floors from water damage:
- Identify The Source Of Water Damage
Hardwood floors can get flooded or overly wet due to a leaky roof, plumbing issues, appliance breakdowns, or even a malfunctioning toilet. Whatever the reason, the sooner you can establish the source of the problem and deal with it, the better your chances of saving your floor.
- Remove Items From The Floor
Items like rugs and some furniture absorb water. The longer they stay on a flooded wood floor will only worsen the situation. If left on the wet floor for a long time, they can transfer moisture to the wood, which will hasten wood cupping or crowning. It also creates a conducive environment for mold and mildew growth. Removing them from the wet floor also clears the way for assessment of the situation and easier water removal.
- Drain The Water From The Floor
The more the water settles on the wood, the deeper it will soak and cause damage. Sealed or waxed wood might not keep your floor completely waterproof. It can only buy you time before water penetrates the wood. Besides, water can also infiltrate the wood through coating breaks between and under-seam baseboards.
Use a squeegee to collect the water, then suck it up with a wet vacuum cleaner. A vacuum cleaner with a wide flooring attachment will make the process more effective. You also need to open doors and windows to enable moisture to evaporate faster.
- Clean The Floor Thoroughly With Disinfectant
After water removal, clean your floor’s wood pores of debris, dirt, silt, or organic material to prevent mold growth. Scrub the entire surface with a mild detergent. Remember to rinse the brush frequently. Treat areas that show signs of mold with trisodium phosphate or its equivalent mixed with water. After that, sponge off the floor with an absorbent dry cloth.
- Dry The Floor
Don’t be tempted to dry your hardwood floor quickly. You don’t need to dry wood in a hurry. Leave your hardwood floor to dry steadily and slowly. Otherwise, it’ll weaken and result in cupping or splitting.
However, you can still use equipment like heaters and dehumidifiers to draw out the excess moisture from the wood. You can also use a carpet drier or large fan at the highest setting near a door opening to blow in hot air. Natural air circulation can help eliminate moisture from the hardwood floor.
- Test Moisture Level
Use a moisture meter to perform a moisture test on the wood after a few days. Don’t be surprised if the wood still retains moisture after a day or two. It can take several weeks for hardwood flooring to dry completely.
How long the wood was exposed to water, the moisture content in the wood and weather conditions are some factors that determine how fast your hardwood floor dries. Letting your dehumidifier run until the wood completely dries will speed up the process.
- Sand The Floor
You might notice some floorboards bending downward or upward when they’ve dried completely. This is called cupping. Fortunately, you can sand down cupping floorboards resulting from water damage. You can also use an orbital or drum sander to flatten higher areas. However, for severely cupped panels, the only solution is to nail them facedown.
- Refinish Your Floor
Mold is notorious and thrives under the paint on hardwood floors easily. The only way around it is to remove your floor’s finishing by scrubbing it with an abrasive cleaner. Before applying a new coat, give it enough time to dry. At least until the moisture level has stabilized. Otherwise, the paint might prevent even drying and cause the wood to buckle, besides other problems.
Conclusion
It’s important to know that acting quickly determines a successful hardwood floor restoration. Acting fast will enable you to do what you need to do to save the floor. Other factors like the age of the floor, level of maintenance, type of wood, and present moisture in the wood will also determine how much of your hardwood floor you can save.
Similar Posts:
- Reasons Why You Need Professional Help after A Flood In Your House
- How to Choose a Cordless Vacuum for Hardwood Floors
- 4 Ways Your Home Can Get Damaged, and What To Do About It
- Navigating the Aftermath of Home Water Damage: A Comprehensive Guide
- 11 Warning Signs You Need Professional Drainage Services
