Outdoor Projects to Start This Weekend
Transforming your garden into a beautiful, functional space doesn’t have to be time-consuming or expensive. Within a weekend, you can make significant improvements that will transform your garden. Whether you’re looking to create a relaxing retreat, boost your home’s curb appeal, or improve your garden’s functionality, there are several projects you can start and finish in just two days. Here are some easy landscaping project ideas to get started this weekend.
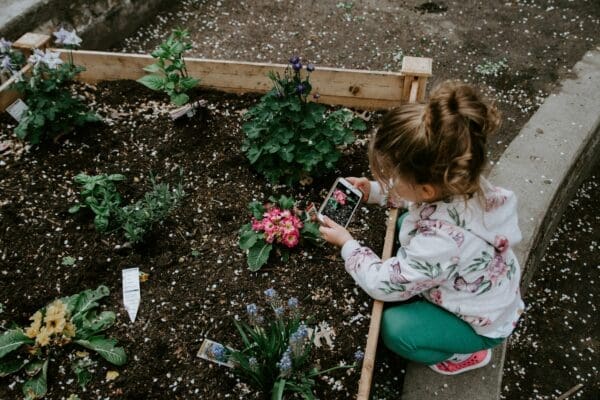
1. Build a Raised Garden Bed
If you’ve always wanted to grow your vegetables or flowers but have struggled with poor soil or limited space, a raised garden bed is an excellent solution. Raised garden beds are easy to construct, and they provide better drainage, soil quality, and accessibility. Plus, they give your garden a neat, organised look.
Materials Needed:
- Wooden planks (cedar is ideal for durability)
- Screws or nails
- Power drill or hammer
- Soil and compost
- Plants or seeds.
Steps:
- Choose a location that gets at least six hours of sunlight a day.
- Measure and cut the wooden planks to your desired size (typically, 4×8 feet is a manageable size).
- Secure the planks together to form a rectangular frame.
- Place the frame in your chosen spot and fill it with a mix of soil and compost.
- Plant your favourite vegetables, herbs, or flowers.
This project is not only simple but rewarding. By the end of the weekend, you’ll have a functionally beautiful garden bed ready to grow your favourite plants.
2. Create a DIY Fire Pit
A fire pit is a perfect addition to any garden. It creates a warm, inviting atmosphere, perfect for outdoor gatherings, evening relaxation, or roasting marshmallows with the family. Building a fire pit is a straightforward DIY project that can be completed over the weekend, especially if you keep it simple.
Materials Needed:
- Fire pit stones or bricks
- Gravel or sand for the base
- Spade and level
- Fire pit ring (optional).
Steps:
- Select a location for the fire pit away from overhanging trees or structures.
- Use a spade to dig a shallow hole (about 6 inches deep) and level the ground.
- Lay down a base of gravel or sand to ensure proper drainage.
- Arrange the stones or bricks in a circle, stacking them as you go. You can create a simple ring or build it higher for added visual impact.
- Optionally, line the inside with a fire-resistant ring to contain the flames.
A DIY fire pit provides both functionality and style, allowing you to enjoy your garden even as the weather cools. Plus, it’s a great focal point for socialising.
3. Install a Gravel Pathway
A well-defined pathway can add character to your garden, guide visitors through your garden, and create a more organised space. Installing a gravel pathway is an easy and inexpensive project that doesn’t require advanced skills, making it perfect for a weekend project.
Materials Needed:
- Gravel (pea gravel or crushed stone works well)
- Gravel grids
- Edging materials (such as wood, metal, or stone)
- Spade and rake.
Steps:
- Decide on the pathway’s route and mark it with spray paint or garden stakes.
- Dig a shallow trench along the marked path to create a base for the gravel.
- Lay down landscape fabric to prevent weeds from growing through the gravel.
- Add a layer of gravel and use a rake to level it evenly.
- Install edging materials along the sides of the path to keep the gravel contained and maintain a clean look.
Not only does a gravel pathway upgrade your garden, but it also serves a practical purpose by keeping muddy footprints at bay. The low-maintenance nature of gravel ensures your pathway will look good year-round.
4. Set Up a Compost Bin
A compost bin is a fantastic way to recycle your kitchen and garden waste while providing nutrient-rich soil for your plants. Building a compost bin is a quick and easy garden project that can have long-term benefits for your garden and the environment.
Materials Needed:
- Wooden pallets or chicken wire (for the bin structure)
- Compostable materials (vegetable scraps, yard waste, etc.)
- A spade or prong for turning the compost.
Steps:
- Choose a spot in your garden that is well-drained and has some shade.
- If using wooden pallets, arrange them into a square or rectangular shape and secure them with screws. Alternatively, you can create a circular bin using chicken wire.
- Start adding compostable materials, alternating between greens (like vegetable scraps) and browns (like leaves or shredded newspaper).
- Turn the compost every few weeks to speed up the decomposition process.
By the end of the weekend, you’ll have a composting system in place that helps reduce waste and enriches your garden soil.
5. Install a Small Water Feature
Adding a water feature to your garden can create a serene atmosphere while improving your garden’s overall look. Whether it’s a small fountain, a pond, or a birdbath, water features are a beautiful and calming addition to any outdoor space. Installing a small water feature is an easy weekend project that doesn’t require significant expertise.
Materials Needed:
- Small water fountain or pond kit
- Gravel or rocks
- Pump (if applicable)
- Plants or water-friendly accessories.
Steps:
- Choose a spot for your water feature, preferably near your seating area, for optimal enjoyment.
- If installing a small fountain, follow the instructions provided with your kit. Place the fountain on a level surface and connect it to the pump.
- If installing a pond, dig a small hole and place a pond liner inside. Fill the pond with water and decorate it with plants and stones.
- Ensure the water feature is clean and functioning properly by testing the pump or water flow.
A small water feature can bring a tranquil touch to your garden, and the soothing sounds of flowing water make it a perfect spot for relaxation.
6. Paint or Refresh Your Fence
A fresh coat of paint can make your old fence look brand new and instantly upgrade the look of your garden. If your fence has been weathered over time, giving it a new lease on life is a simple weekend project that can make a big impact.
Materials Needed:
- Outdoor paint or stain
- Paintbrushes or rollers
- Painter’s tape (if necessary)
- Drop cloths to protect the ground.
Steps:
- Clean the fence by removing dirt, moss, or loose paint.
- Apply painter’s tape to edges or areas you want to protect from paint.
- Using a paintbrush or roller, apply a coat of paint or stain to your fence.
- Allow the paint to dry, and apply a second coat if necessary.
A freshly painted fence can make your garden feel more polished and complete, improving your curb appeal in the process.
Don’t Wait to Get Started
Once you have decided on your project, all you need to do is set a weekend aside and commit. With a little effort and creativity, you can make your garden a beautiful and functional place for relaxation, entertaining, and enjoying the outdoors throughout the year. So, grab your tools, get started, and make this weekend the beginning of your garden’s transformation!