How to Install Plug-and-Play Lighting Systems at Home Without Professional Help
Complicated lighting installations and the expense of hiring professionals can be major hurdles in home improvement. But do not worry; enter plug-and-play lighting systems. They are a revolutionary solution combining style, functionality, and user-friendliness. These innovative systems allow for quick and easy installation without any specialized knowledge or tools.
This lighting system transforms your home with cutting-edge solutions without disturbing your budget. Whether you’re a renter or a homeowner, plug-and-play systems offer versatility and convenience, allowing you to customize your space effortlessly and achieve professional-looking results.
So, if you are ready to learn how to choose the right system, installation steps, or ways to expand your lighting setup, I have described everything in detail.
Know the Basics of Plug-and-Play Lighting Systems
Before starting the installation process, it’s essential to understand what makes plug-and-play lighting systems unique. This system stands out for its user-friendly design. These modern solutions offer hassle-free setups without special tools or electrical expertise. Plug-and-play combines ease and adaptability, suiting diverse living spaces. From small apartments to large houses, it provides an easy installation to increase your lighting.
Key Features of Plug-and-Play Lighting
What makes it unique from other lighting systems is due to the following features:
- No-tool setup
- Wireless connectivity
- Smart controls
- Energy efficiency
- Versatility in design and function
Choosing the Right System for Your Needs
To start your do-it-yourself lighting project, pick the best system for your room and what you want. Think about these things:
Room Type and Size
Each room needs its own kind of light. Some examples are:
- Living Rooms: Choose lights you can make brighter or dimmer. Pick ones that change color. This makes different feelings in rooms.
- Kitchens: Look for task lighting options, such as under-cabinet lights.
- Bedrooms: Choose systems with dimming capabilities for a relaxing atmosphere.
- Home Offices: Prioritize adjustable, glare-free lighting for productivity.
Smart Features
Many plug-and-play systems come with smart features that improve their functionality:
- Voice control compatibility
- Smartphone app integration
- Motion sensors for energy savings
- Scheduling options for automated lighting
Design Aesthetics
Pick lights that look good with your furniture and walls. Choose colors and styles that match your home like:
- Minimalist designs for modern interiors
- Vintage-inspired options for traditional spaces
- Colorful and playful designs for kids’ rooms
Preparing for Installation
Once you’ve chosen your ideal plug-and-play lighting system, it’s time to prepare for installation. Here’s what you’ll need:
- Your chosen lighting system
- A strong ladder or step stool if you need to reach high
- Basic measuring tools
- Cleaning supplies
Pre-Installation Checklist
- Clear the area where you’ll be working
- Ensure you have a nearby power outlet
- Map out your desired lighting layout
- Read through the manufacturer’s instructions thoroughly
Step-by-Step Installation Guide
Let’s start installing your lights. Don’t worry, it’s quite easy. Plug-and-play lights are made to be simple, so you can do this without any fear.
1. Unbox and Inventory
Start by unpacking your lighting system and making sure all components are present. This typically includes:
- Light fixtures
- Control hub (for smart systems)
- Mounting hardware
- Power adapters
2. Plan Your Layout
Before mounting anything, test your layout:
- Place lights in their intended positions
- Check for optimal coverage and aesthetics
- Ensure power cords can reach outlets without being stretched
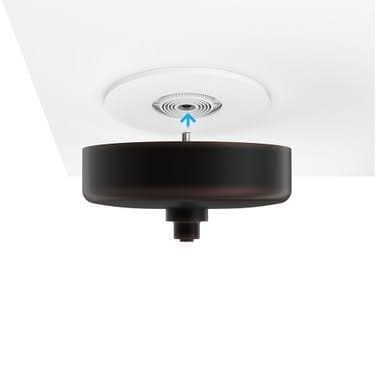
3. Mount the Fixtures
Most plug-and-play systems use one of these mounting methods:
- Adhesive strips for damage-free installation
- Simple brackets for more permanent setups
- Clip-on mechanisms for adjustable positioning
Follow the manufacturer’s guidelines for the best results.
4. Connect the System
This step varies depending on your chosen system:
- For basic systems, simply plug the lights into a power outlet.
- For smart systems:
- Plug in and set up the control hub
- Connect lights to the hub following the app instructions
- Ensure all components are recognized by the system
5. Configure and Customize
Now that your lights are up and working, you can make them special in the following ways:
- Set up schedules for automatic operation
- Experiment with color temperatures and brightness levels
- You can create special light settings for different things you do or how you feel. If you have other smart home gadgets, you can connect your lights to them.
Fixing Problems That Might Happen
Even with user-friendly plug-and-play systems, you might face some minor issues. Here are solutions to common problems:
Lights Not Turning On
- Check all connections are secure
- Ensure the power outlet is functioning
- For smart systems, restart the hub and reconnect
Uneven Lighting
- Adjust the position of individual lights
- Check for hurdles affectingthe light distribution
- Consider adding additional lights to problem areas
Connectivity Issues (Smart Systems)
- Restart your Wi-Fi router
- Move the hub closer to your router
- Update the system’s firmware if available
How to Maximize Your New Lighting System?
Now that your plug-and-play lighting is up and running, here are some tips to get the most out of it:
Energy Efficiency
- Use scheduling features to turn lights off when not needed
- Pick LED bulbs for long-term energy savings
- Install motion sensors in low-traffic areas
Creating Ambiance
- Experiment with color-changing features for different moods
- Layer lighting using a combination of overhead, task, and accent lights
- Use dimming features to adjust light levels throughout the day
Seasonal Adaptations
- Create special lighting scenes for holidays and celebrations
- Adjust color temperatures to match natural light in different seasons
- Use timers to meet shorter winter days
Expanding Your Plug-and-Play System
One of the best things about these easy-to-use lights is that you can add more later. As your needs change or you become more comfortable with the technology, consider these expansion ideas:
- Put special lights to show off pictures or nice parts of your house
- Extend your system to outdoor spaces like patios or balconies
- Connect your lights to other smart home things. This makes your whole house work together automatically
Conclusion
To sum up, Installing plug-and-play lighting systems is a perfect way to modernize your home without the need for extensive renovations or professional help. These lighting systems are easy to use and can do many things. They help you make any room feel just right without much work.
So brighten up your home and enjoy the newfound control and atmosphere that your plug-and-play lighting project has brought to your living space.